Medline Industries
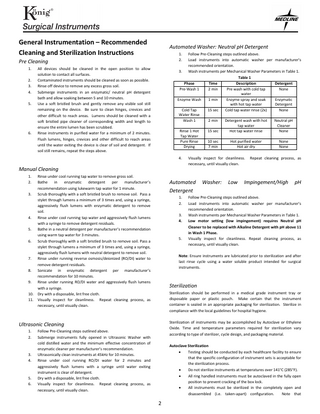
Konig Surgical Instruments General Instrumentation Recommended Cleaning and Sterilization Instructions
2 Pages
Preview
Page 1
General Instrumentation – Recommended Cleaning and Sterilization Instructions
Automated Washer: Neutral pH Detergent 1. 2.
Follow Pre-Cleaning steps outlined above. Load instruments into automatic washer per manufacturer’s recommended orientation. 3. Wash instruments per Mechanical Washer Parameters in Table 1. Table 1 Phase Time Description Detergent Pre-Wash 1 2 min Pre wash with cold tap None water Enzyme Wash 1 min Enzyme spray and soak Enzymatic with hot tap water Detergent Cold Tap 15 sec Cold tap water rinse (2x) None Water Rinse Wash 1 2 min Detergent wash with hot Neutral pH tap water Cleaner Rinse 1 Hot 15 sec Hot tap water rinse None Tap Water Pure Rinse 10 sec Hot purified water None Drying 7 min Hot air dry None
Pre Cleaning 1. 2. 3. 4. 5.
6.
All devices should be cleaned in the open position to allow solution to contact all surfaces. Contaminated instruments should be cleaned as soon as possible. Rinse off device to remove any excess gross soil. Submerge instruments in an enzymatic/ neutral pH detergent bath and allow soaking between 5 and 10 minutes. Use a soft bristled brush and gently remove any visible soil still remaining on the device. Be sure to clean hinges, crevices and other difficult to reach areas. Lumens should be cleaned with a soft bristled pipe cleaner of corresponding width and length to ensure the entire lumen has been scrubbed. Rinse instruments in purified water for a minimum of 2 minutes. Flush lumens, hinges, crevices and other difficult to reach areas until the water exiting the device is clear of soil and detergent. If soil still remains, repeat the steps above.
4.
Manual Cleaning 1. 2.
Rinse under cool running tap water to remove gross soil. Bathe in enzymatic detergent per manufacturer’s recommendation using lukewarm tap water for 1 minute. 3. Scrub thoroughly with a soft bristled brush to remove soil. Pass a stylet through lumens a minimum of 3 times and, using a syringe, aggressively flush lumens with enzymatic detergent to remove soil. 4. Rinse under cool running tap water and aggressively flush lumens with a syringe to remove detergent residuals. 5. Bathe in a neutral detergent per manufacturer’s recommendation using warm tap water for 3 minutes. 6. Scrub thoroughly with a soft bristled brush to remove soil. Pass a stylet through lumens a minimum of 3 times and, using a syringe, aggressively flush lumens with neutral detergent to remove soil. 7. Rinse under running reverse osmosis/deionized (RO/DI) water to remove detergent residuals. 8. Sonicate in enzymatic detergent per manufacturer’s recommendation for 10 minutes. 9. Rinse under running RO/DI water and aggressively flush lumens with a syringe. 10. Dry with a disposable, lint free cloth. 11. Visually inspect for cleanliness. Repeat cleaning process, as necessary, until visually clean.
Automated Detergent 1. 2. 3. 4.
5.
3. 4.
5. 6.
Washer:
Low
Repeat cleaning process, as
Impingement/High
pH
Follow Pre-Cleaning steps outlined above. Load instruments into automatic washer per manufacturer’s recommended orientation. Wash instruments per Mechanical Washer Parameters in Table 1. Low motor setting (low impingement) requires Neutral pH Cleaner to be replaced with Alkaline Detergent with pH above 11 in Wash 1 Phase. Visually inspect for cleanliness. Repeat cleaning process, as necessary, until visually clean.
Note: Ensure instruments are lubricated prior to sterilization and after last rinse cycle using a water soluble product intended for surgical instruments.
Sterilization Sterilization should be performed in a medical grade instrument tray or disposable paper or plastic pouch. Make certain that the instrument container is sealed in an appropriate packaging for sterilization. Sterilize in compliance with the local guidelines for hospital hygiene. Sterilization of instruments may be accomplished by Autoclave or Ethylene Oxide. Time and temperature parameters required for sterilization vary according to type of sterilizer, cycle design, and packaging material.
Ultrasonic Cleaning 1. 2.
Visually inspect for cleanliness. necessary, until visually clean.
Follow Pre-Cleaning steps outlined above. Submerge instruments fully opened in Ultrasonic Washer with cold distilled water and the minimum effective concentration of enzymatic cleaner per manufacturer’s recommendation. Ultrasonically clean instruments at 45kHz for 10 minutes. Rinse under cool running RO/DI water for 2 minutes and aggressively flush lumens with a syringe until water exiting instrument is clear of detergent. Dry with a disposable, lint free cloth. Visually inspect for cleanliness. Repeat cleaning process, as necessary, until visually clean.
Autoclave Sterilization • Testing should be conducted by each healthcare facility to ensure that the specific configuration of instrument sets is acceptable for the sterilization process. • Do not sterilize instruments at temperatures over 141°C (285°F). • All ring handled instruments must be autoclaved in the fully open position to prevent cracking of the box lock. • All instruments must be sterilized in the completely open and disassembled (i.e. taken-apart) configuration. Note that
2
• • • • •
applicable instrument disassembly should not require any mechanical tooling (i.e. screwdriver, pliers etc.). All flush ports shall remain in the fully open position. All devices shall be positioned to allow steam contact of all surfaces. All instruments with concave surfaces shall be placed so that the surfaces will drain water. Always verify parameters with sterilizer manufacturer’s written instructions. The use of “flash” sterilization is not recommended, as it may shorten the life of instruments.
Cycle Type Prevacuum
Cycle Type Prevacuum
Cycle Type Gravity Displacement
Parameter Exposure Temp Exposure Time Dry Time
Minimum Set Point 270˚F (132˚C) 4 minutes 30 minutes
Parameter Exposure Temp Exposure Time Dry Time
Minimum Set Point 275˚F (135˚C) 3 minutes 30 minutes
Parameter Exposure Temp Exposure Time Dry Time
Minimum Set Point 270˚F (132˚C) 15 minutes 30 minutes
Storage After sterilization, instruments should remain in sterilization wrap and be stored in a clean and dry environment. The devices are manufactured from non-degradable materials. When stored under the recommended conditions, the shelf life of this product is not limited.
Maintenance Attention: Apply lubricant only on the connecting elements (locking mechanism) and moving parts. Repair To ensure that all repairs are completed according to the manufacturer’s specifications, the precision instrument should only be repaired by an authorized service agent only. All products are guaranteed to be free from defects in material and workmanship at the time of shipping. All of our products are designed and manufactured to meet the highest quality standards. We cannot accept liability for failure of products which have been modified in any way from their originals. NOTE: IT IS THE RESPONSIBILITY OF THE REPROCESSOR TO ENSURE THAT THE REPROCESSING IS ACTUALLY PERFORMED USING EQUIPMENT, MATERIALS AND PERSONNEL IN THE REPROCESSING FACILITY ACHIEVE THE DESIRED RESULT. THIS REQUIRES VALIDATION AND ROUTINE MONITORING OF THE PROCESS. LIKEWISE ANY DEVIATION BY THE REPROCESSOR FROM THE INSTRUCTIONS PROVIDED MUST BE PROPERLY EVALUATED FOR EFFECTIVENESS AND POTENTIAL ADVERSE CONSEQUENCES.
3
©2014, 2015 Medline Industries, Inc. All rights reserved. König and Medline are registered trademarks of Medline Industries, Inc. Mundelein, IL 60060 USA. 1-800-MEDLINE. www.medline.com